A170 & C190 Conference Rooms
A170 and C190 Conference Rooms
Selecting Your Computer and Room
A Separate configuration is a single room config using A, B or C.
A Combined configuration includes either two or three rooms.

Press Turn System On to start room.
2. Next select either Presentation or Meeting mode settings.
Presentation mode ceiling mics pick up front of room only.
Meeting mode ceiling mics pick up the whole room.
3. Next press the Room _ PC letter that's going to be used for the event. 
If using a Laptop connect it to the HDMI cable located on computer workstation.
Once connected the laptop will auto-source and display on screen.
**Room A HDMI is only used for special events that need to be operated from a tech table in the back of the room**
**In room camera's and microphones will only work with the in room PC**
4. For BYOD press the AirMedia tab to display login information.
For more details on using Air Media Click here
Room Controls, Cameras, and Microsoft Teams
In room Camera's and Microphones can be used with the in room PC's for Teams or Kaltura Capture
1. After selecting your room the control page displays on touch panel.
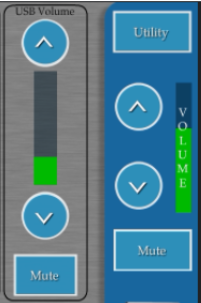
2. Two separate volume controls are located on the display.
USB Volume is for far end caller in a Teams Meeting.
Volume control on right is used for computer audio.
3. Camera Controls can zoom, pan, and mute cameras.


**In room camera's and microphones will only work with the in room PC**
4. Presets are available to quickly change camera views.
To program preset, adjust the camera to the desired position then press and hold and a keyboard will appear to rename.

5. Press the Utility tab to power on/off a projector or mute image.
Press the Lights tab to change the room lighting settings.
6. Tap EXIT to power down and turn off room.


